Now Chromebooks are getting popular among students as ChromeOS is now supporting android apps and a Chromebook can handle day-to-day tasks like are writing docs, stream Netflix, editing photos, and a lot more. If you are new to the ChromeOS ecosystem and having an issue in saving images on Chromebook this article is for you. Having said that, let’s now go through the process step by step.
How to Save an Image on Chromebook
Step 1. Open the chrome browser on your laptop.
Step 2. Navigate to the web page from which you want to save an image
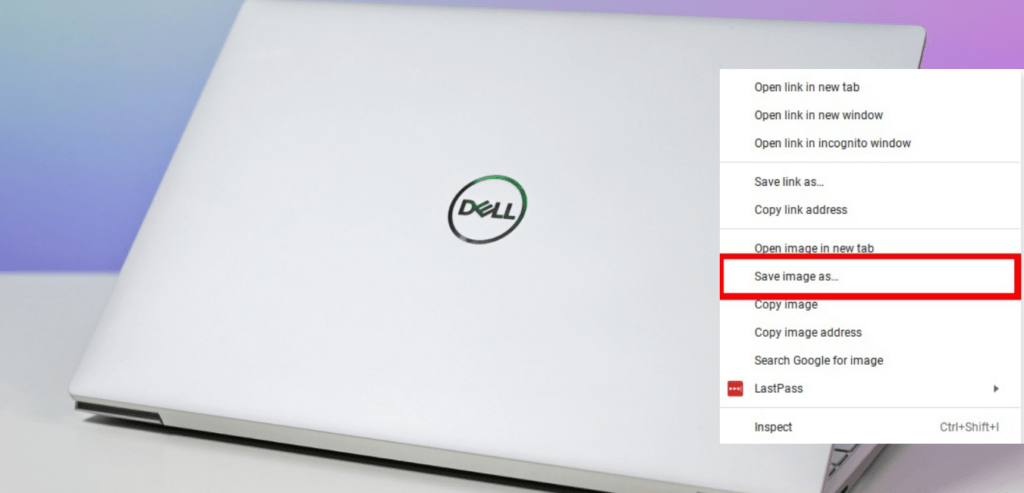
Step 3. Now “Right-click” on the desired image by tapping the trackpad with two fingers.
Step 4. Click on “save image as”

Step 5. Change the image name and save location if you desired
Step 6. Now Click “save.“
Also See: How to Convert iPhone Photo to JPG
How to Find Saved Pictures on Chromebook
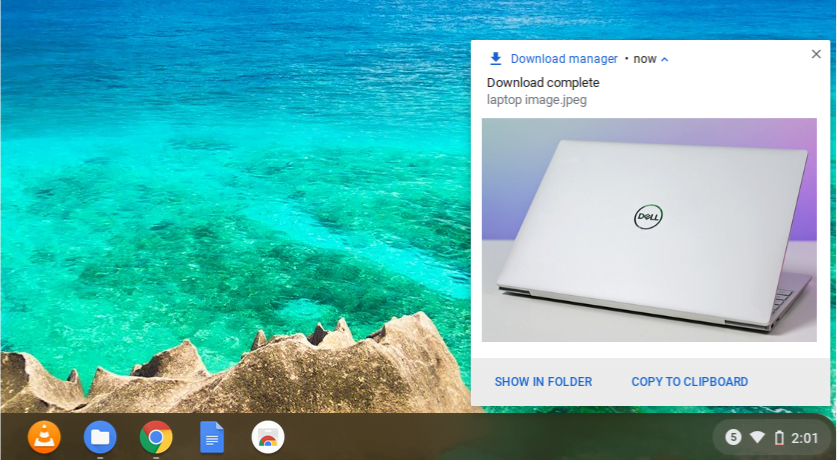
1. You can open the image by clicking “Show in the folder” on that preview and then double-clicking the image.

2. If the preview box has already closed, now you can access it via your ”files” app. Launch the Files app from the applications.
The image will be saved to the location you specified at the time of saving it. Otherwise, it will get saved to your “Downloads” folder.
Also Read: How to Screenshot on Dell Laptop
Conclusion
I hope this article has helped you and now you know how to save images on Chromebook by this tip will help you get the most out of the Chromebook for more awesome Chromebook tips and tricks to keep visiting the blog.
Also Read: How to Screenshot on Microsoft Surface Laptop & How to unblock websites on school Chromebook
