
If you know how to take a screenshot on your laptop can improve your productivity a lot and make your life easier. Every laptop comes with different shortcodes as it is easy to execute the tasks. Every laptop manufactures have their creative freedom to design its product, at the end we end consumers are in trouble to search the solution in our learning curve, we have crafted a simple step-by-step guide on How to Screenshot on a Dell laptop.
How to Screenshot on Dell Laptop
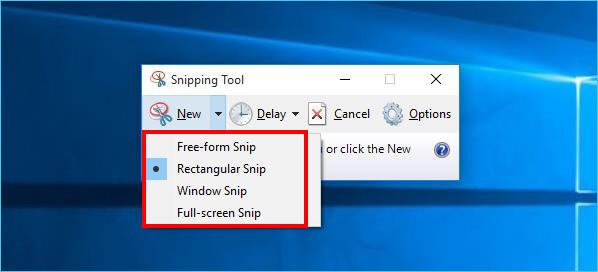
Method 1: Use the preinstalled screenshot tool on Dell Laptop
Click the Windows icon and go to Windows Accessories > Snipping Tool > New, drag the cursor to select the desired screenshot area.
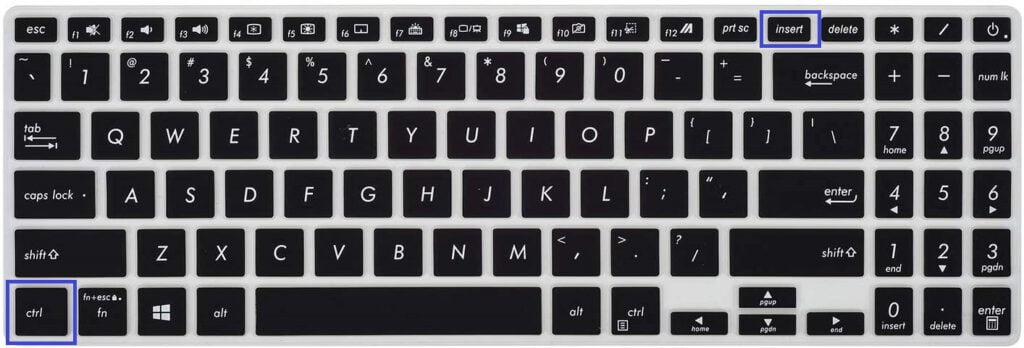
Method 2: Keyboard Shortcut On Dell Laptop: PrtScn (Print Screen) Or CTRL+ PrtScn
- On a window laptop, open the Page you would like to take a screenshot on
- On your keyboard, tap the PrtSc button once, this should capture the screen
- Open an image editing program such as paint
- Paste the screenshot using the Ctrl and V buttons on your keyboard
- Save the file
Method 3: You can also use a third-party tool to take screenshots.
For example, using a third-party social media app.
Conclusion
By follow the all steps you will be able to Screenshot on Dell Laptop and this article will help make your life easier if you are facing any other issue please do comment it below we will try to solve it ASAP.